

- How to understand lock contention by reproducing a basic example.
- How to identify waiting and blocking transactions by using the Insights page of the DB Console.
- Possible ways to remediate lock contention.
Before you begin
and . The examples in this tutorial will use three terminals, one for each transaction.Terminal 1
In the first terminal, use the command to start a temporary, in-memory CockroachDB cluster of one node.defaultdb. This database is used for testing and some internal databases.
To distinguish each terminal that you’ll use in this tutorial, set the application_name:
Terminal 2
In a second terminal, open another SQL shell to the demo cluster using thecli command from the \demo ls output:
application_name:
Terminal 3
In a third terminal, open another SQL shell to the demo cluster using thecli command from the \demo ls output:
application_name:
DB Console
In a web browser, open the DB Console to the demo cluster using thewebui address from the \demo ls output:
Step 1. Understand lock contention
In this step, you’ll load some initial data to prepare the table for a set of transactions that will cause lock contention.Initial Data
In any of the SQL shells, create a table and insert some data:Example 1
In this example, Transaction 1 is a write that blocks both Transaction 2 and Transaction 3. Transaction 2 is a read, and Transaction 3 is a write. Transaction 1 locks keyk=2. When Transaction 2 tries to read key k=2, it experiences lock contention and waits for the lock on the key to be released. Similarly, when Transaction 3 tries to write to key k=2, it experiences lock contention and waits for the lock on the key to be released.
| Transaction 1 (blocking write) | Transaction 2 (waiting read) | Transaction 3 (waiting write) |
|---|---|---|
BEGIN; | ||
UPDATE t SET v=2012 WHERE k=2; | BEGIN; | |
| lock k=2 | SELECT \* FROM t WHERE k=2; | BEGIN; |
| waiting | UPDATE t SET v=2032 WHERE k=2; | |
| waiting | ||
COMMIT; | unblocked to proceed | unblocked to proceed |
| success, k=2,v=2012 | k=2, v=2012 | |
COMMIT; | COMMIT; | |
| success | success | |
SELECT \* FROM t WHERE k=2; | ||
| k=2, v=2032 |
SQL statements
To reproduce Example 1 in CockroachDB in preparation for the next section on how to identify waiting and blocking transactions, execute the following SQL statements in the given order in the specified terminal. Terminal 1k=2, Transaction 2 should output the following:
COMMIT Transaction 2:
COMMIT Transaction 3 and verify that the UPDATE has succeeded:
SELECT statement should output the following:
Step 2. Identify waiting and blocking transactions
This section of the tutorial uses the of the DB Console to identify waiting and blocked transactions in the demo cluster. With a CockroachDB Cloud cluster, the Cloud Console has a similar . You can also use the system catalog to view tables and indexes that experienced contention. This step assumes you have already run the SQL statements from Example 1. When troubleshooting lock contention in your own workload, you can adapt the following steps using the DB Console or the Cloud Console.High Contention Insights
After executing the transactions in the previous section, open the DB Console for the demo cluster. Navigate to the Insights page and select Workload Insights > Transactions Executions.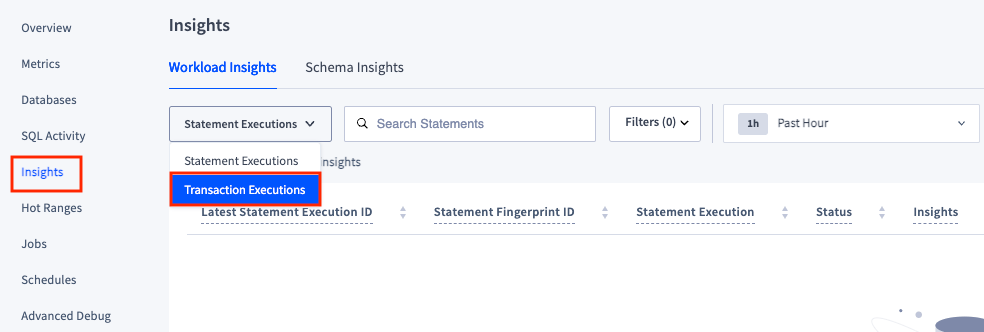
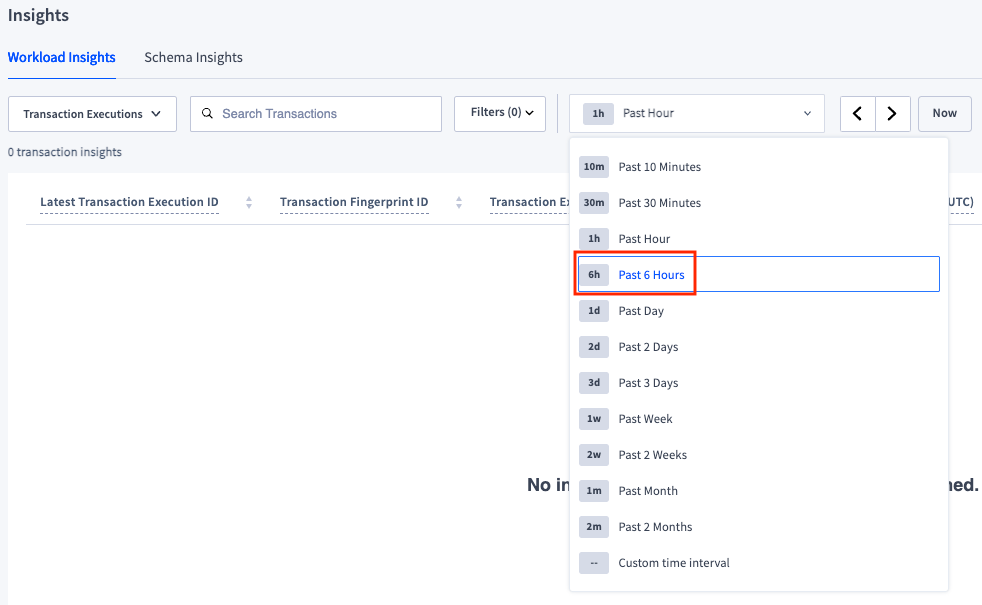
- Transaction 2
-
Transaction 3
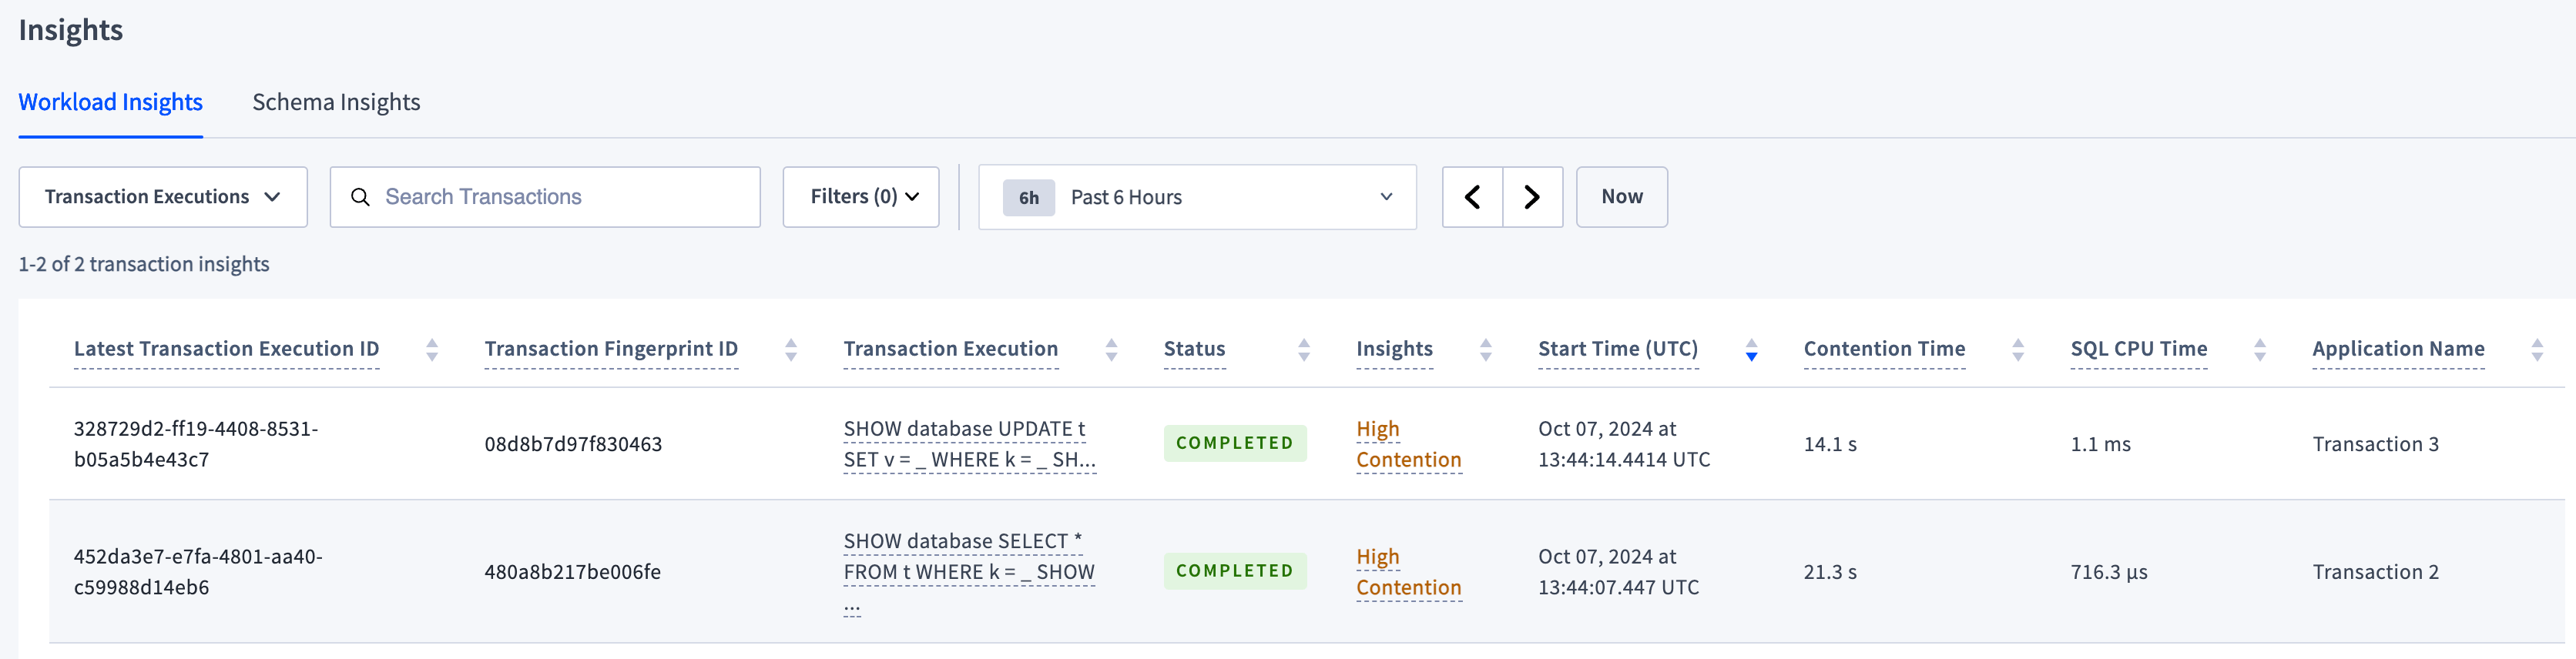
Waiting statement
To identify the exact statement in the transaction that experienced high contention, click the value in the Latest Transaction Execution ID column that corresponds to the ID of the latest execution with the given . On the Transaction Execution page, navigate to the Statement Executions tab. In the list of statement executions, in the Insights column forSELECT * FROM t where k = _, there should be the High Contention insight. In Example 1, Transaction 2 had one statement (other than SHOW database). In a transaction with multiple statements, use this page to pinpoint the exact statement that experienced high contention.
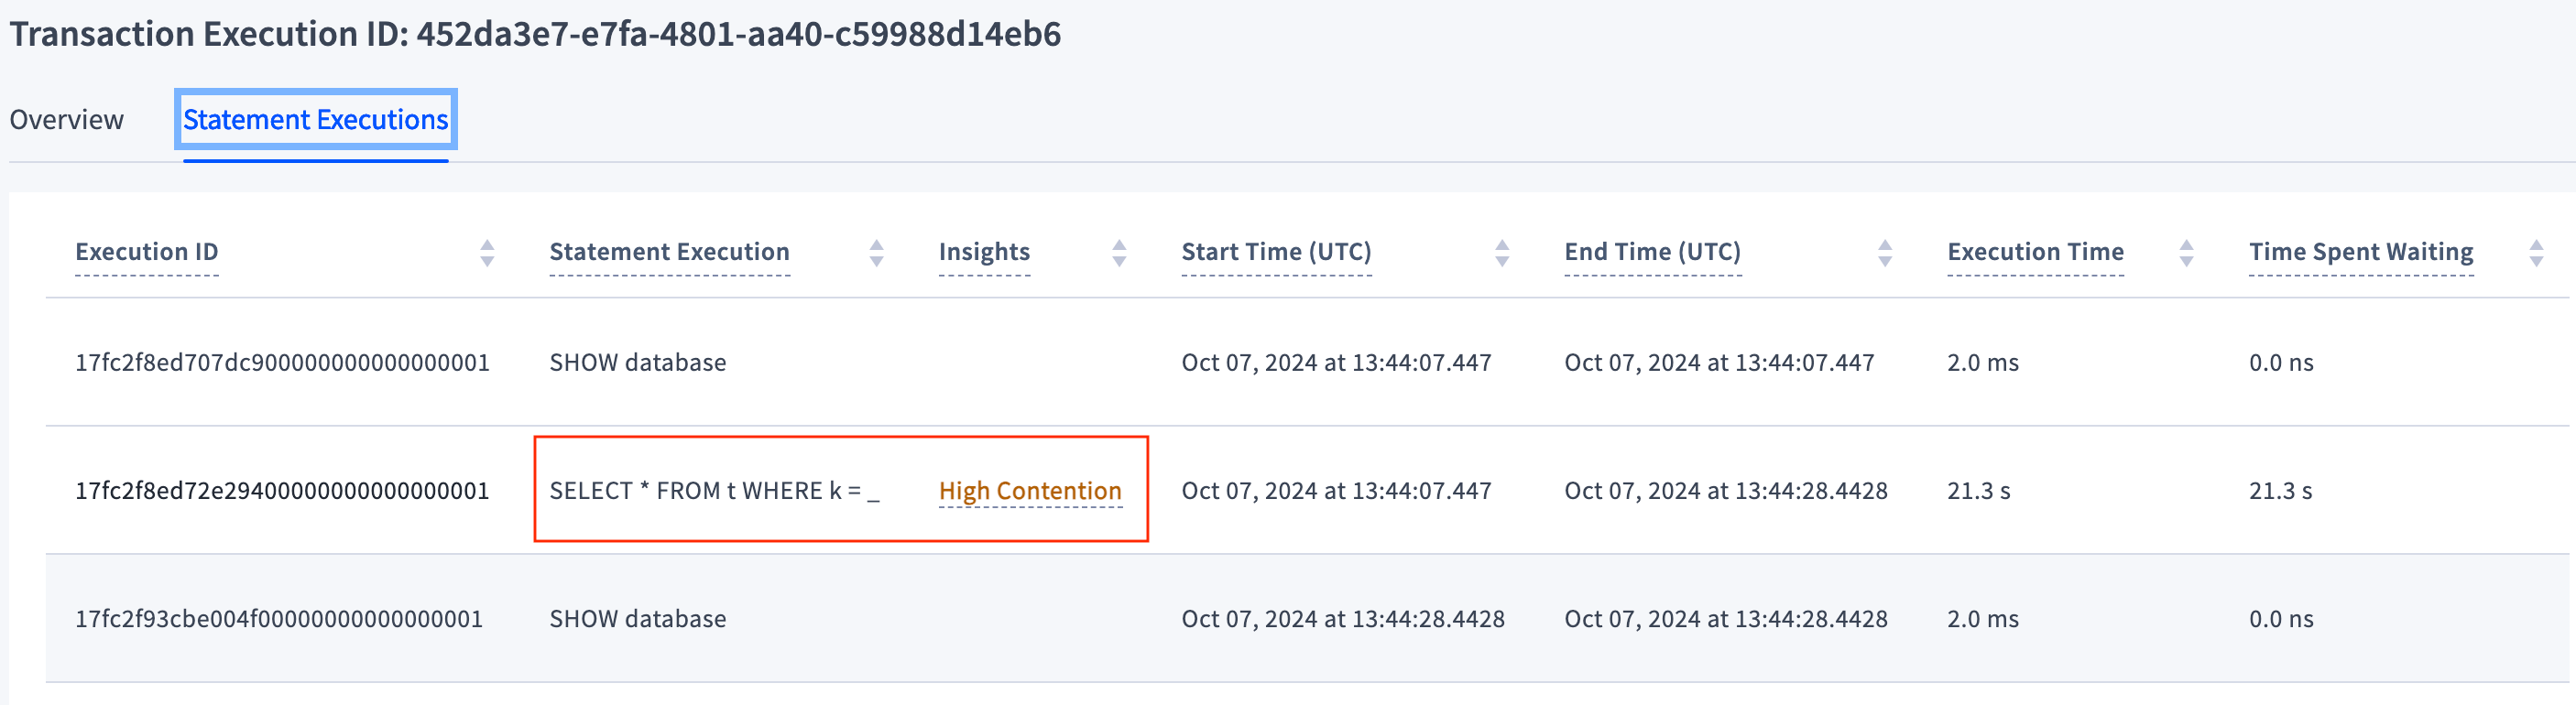
Blocking transaction
To identify the transaction that blocked Transaction 2 and caused it to experience high contention, navigate back to the Overview tab.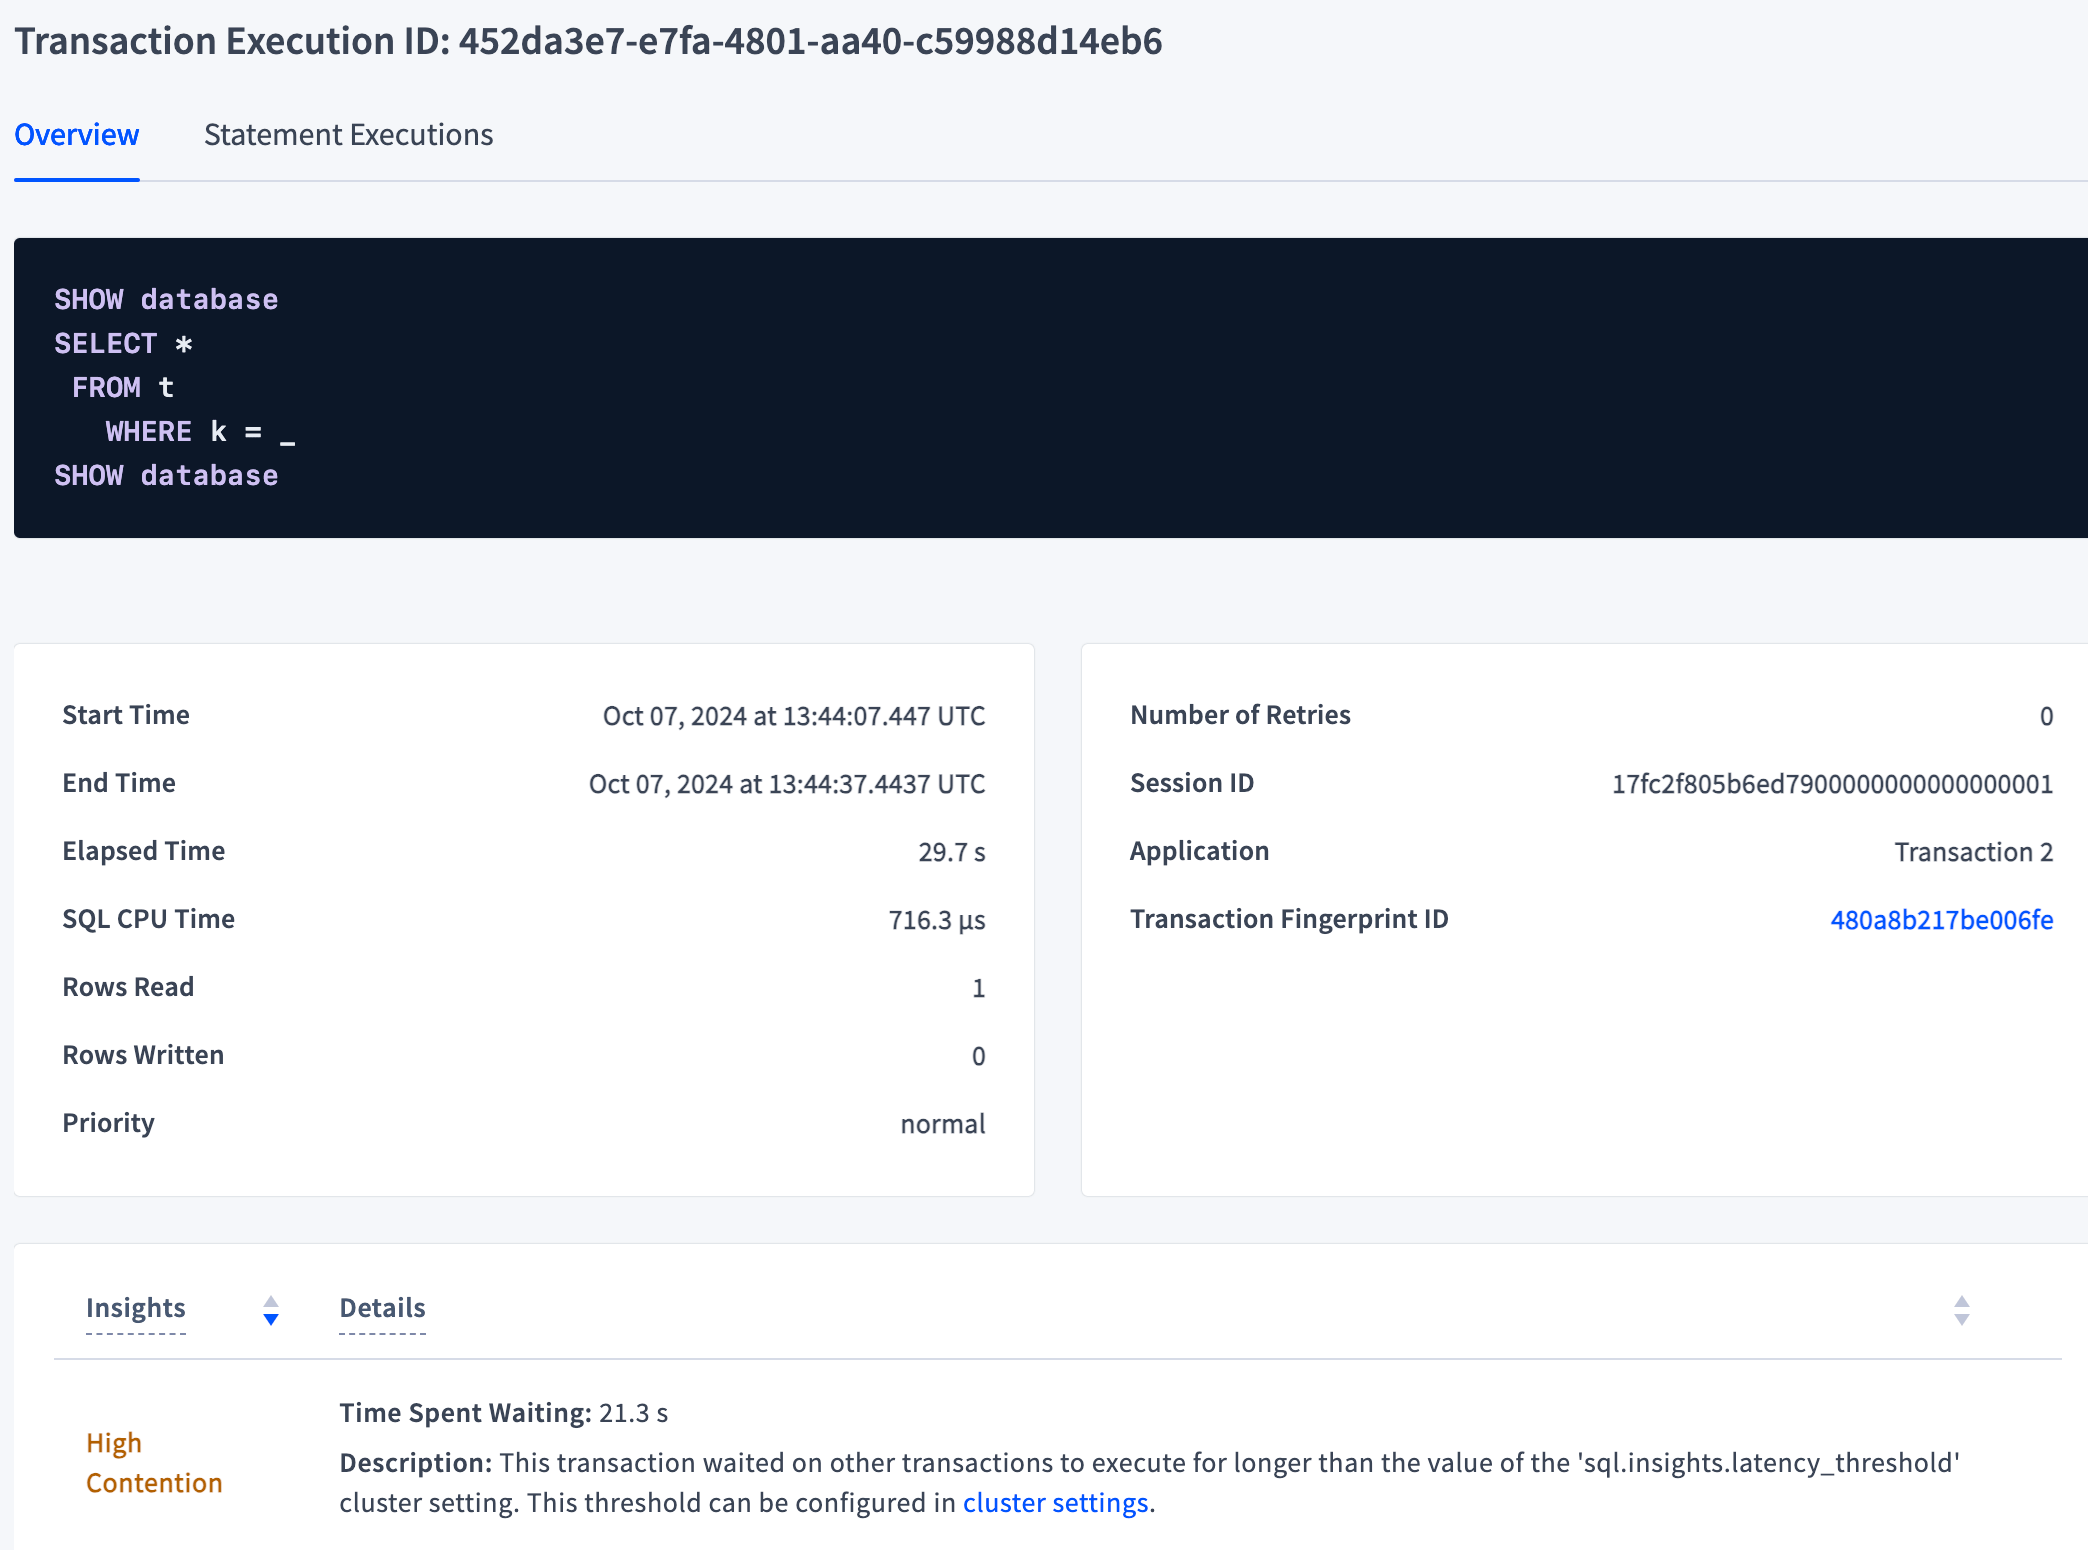

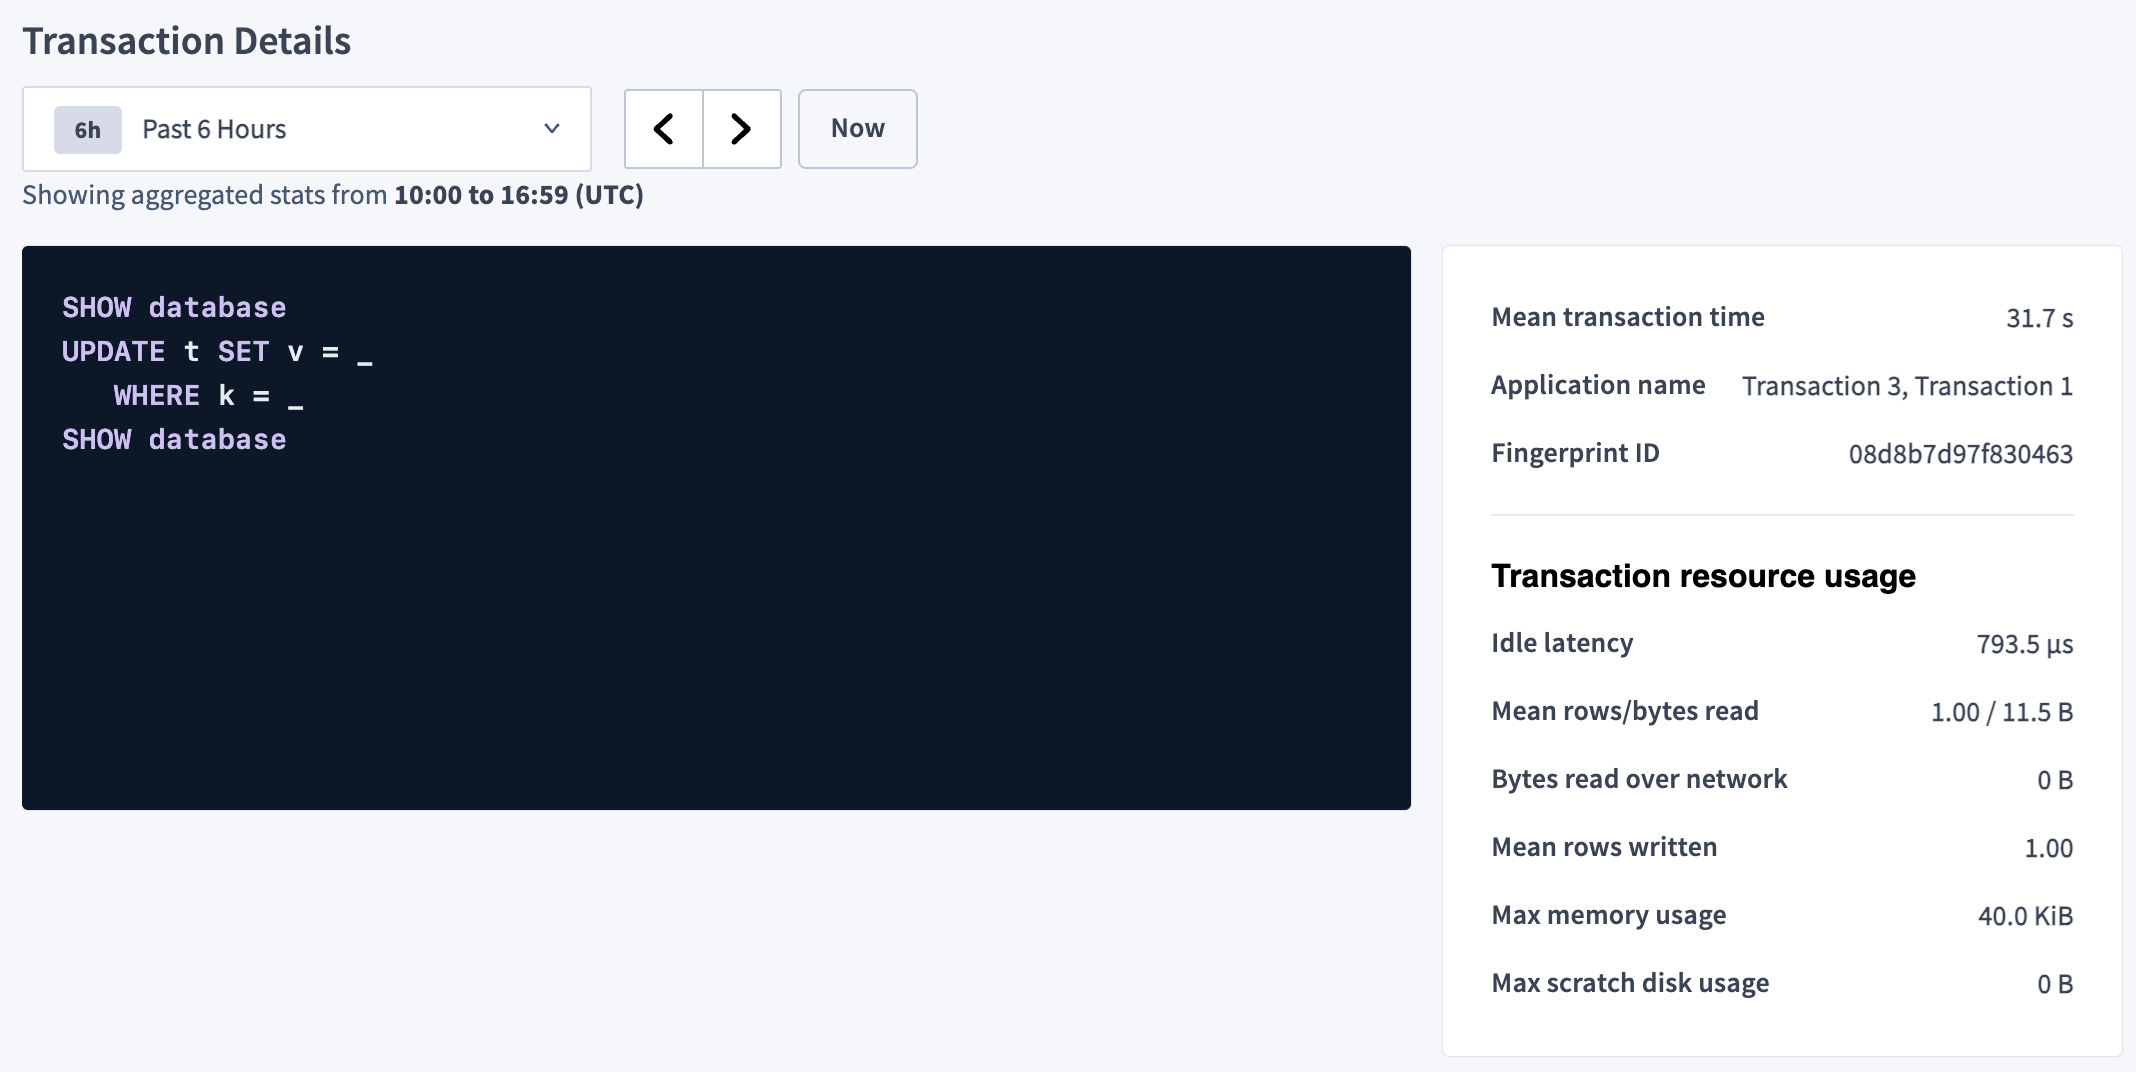
Additional practice
For Transaction 3, take steps similar to Transaction 2 in order to identify the waiting statement that experienced high contention and the corresponding blocking transaction.Step 3. Remediate lock contention
Background context
Locking conflicts are a natural artifact when business requirements call for concurrent data changes. Realistically, locking conflicts are unavoidable. Remediation is required when locking conflicts are too numerous, resulting in either a significant increase in response time or decrease in throughput or both. Remediation of locking conflicts is typically about giving up some functionality in exchange for a reduction in locking contention. Example 2 uses two ways of doing this: and a . Use these remediations if they fit your application design.Historical queries
One way to reduce lock contention is to replace reads with historical reads using wherever possible. Using this, your query returns data as it appeared at a distinct point in the past and will not cause conflicts with other concurrent transactions, which can increase your application’s performance. An example of this method is Transaction 5 in Example 2:- Use historical queries only if the application can use data that is old.
- Historical queries primarily benefit read-only transactions.
- Historical queries operate below and therefore have perfect concurrency characteristics - they never wait on anything and never block anything.
- Historical queries have the best possible performance, since they are served by the nearest .
Randomize transaction anchor keys for large batched updates or inserts
In some workloads with large batched or transactions, many concurrent transactions can end up with their colocated on the same . The for that range must coordinate for all of those transactions, and can become a even if the actual user data being modified is well-distributed. When troubleshooting contention or hotspots that you have confirmed are due to transaction record placement (for example, using the guidance in ), you can experiment with enabling the cluster setting . When set totrue, this setting randomizes a transaction’s anchor key (the key where its transaction record is stored). This can spread transaction records across ranges and reduce hotspots for large batched update or insert workloads.
Consider the following when using this setting:
- It is primarily useful for workloads that issue large batched updates or inserts and show clear evidence of transaction-record hotspotting.
- It does not change which user data rows are read or written; it only affects where the transaction record (metadata) is stored.
- Treat this as a tuning and troubleshooting knob: enable it only after identifying transaction-record hotspots, and compare contention and latency metrics before and after the change.
- If enabling the setting does not improve the hotspot symptoms, or if it has unintended side effects, you can disable it again with:
“Fail fast” method
One way to reduce lock contention with writes is to use a “fail fast” method by using before the write. It can reduce or prevent failures late in a transaction’s life (e.g. at theCOMMIT time), by returning an error early in a contention situation if a row cannot be locked immediately. An example of this method is Transaction 6 in Example 2:
Initial Data for Example 2
In any of the SQL shells, create a second table and insert some data:Example 2
This example will show how to prevent lock contention by using a historical read and a “fail fast” write. Transaction 4 is a write that does not block either Transaction 5, a read, or Transaction 6, a write. Transaction 4 locks keyk=4. When Transaction 5 tries to read key k=4, it does not experience lock contention because it does not have to wait for the lock on the key to be released. Transaction 5 uses to do a historical read. When Transaction 6 executes the on key k=4, an error is returned since the key k=4 cannot be locked immediately. In other words, Transaction 6 “fails fast”. It does not even attempt to do an UPDATE write to key k=4, so it does not experience lock contention.
| Transaction 4 (blocking write) | Transaction 5 (historical read) | Transaction 6 (fail fast write) |
|---|---|---|
BEGIN; | ||
UPDATE t2 SET v=4014 WHERE k=4; | BEGIN AS OF SYSTEM TIME '-30s'; | |
| lock k=4 | SELECT \* FROM t2 WHERE k=4; | BEGIN; |
| not waiting | SELECT \* FROM t2 WHERE k=4 FOR UPDATE NOWAIT; | |
| k=4,v=4 | error: could not obtain lock | |
COMMIT; | UPDATE t2 SET v=4034 WHERE k=4; | |
| success, k=4,v=4014 | not waiting | |
COMMIT; | COMMIT; | |
| success | failure | |
SELECT \* FROM t2 WHERE k=4; | ||
| k=4, v=4014 |
SQL statements for Example 2
To reproduce Example 2, execute the following SQL statements in the given order in the specified terminal. Terminal 1SELECT... FOR UPDATE NOWAIT returns:
COMMIT Transaction 6. Since the SELECT statement in Transaction 6 generated an error, COMMIT is equivalent to ROLLBACK, which aborts the transaction and discards the UPDATE. Afterward, verify that the UPDATE was discarded.
SELECT statement should output the following: